Showing posts with label cooking. Show all posts

Friday, June 26, 2015

firecracker flag cakes

Howdy y'all! For my first post back I thought I would get festive with some 4th of July treats. Perfect to satisfy your sweet tooth, I made some Firecracker Flag Mini-Cakes.


I started off by just baking white cake. I made mine from a box mix, but you can do it homemade if that's what you prefer. I cut my cake into two separate slices and let them cool while I got the icing ready.

 Again, if you prefer homemade icing, go for it, but I just used store bought vanilla icing. I plopped a dollop of it into two bowls and put red food coloring in one, and blue in the other. After I had those all mixed up, I went back to my cake.

Using a star shaped cookie cutter, I cut into the cake slowly and carefully {don't want that sucker fallin' apart ya' know?}and made a bunch of little stars. You will have cake left over, but I'm sure somebody will be able to find a place for it if you know what I mean... ;)


After you've cut the stars, it's time to ice, ice, baby! {lol sorry that was really dumb} Using your blue, cover two of the points of the star with icing and bring it to a point at the middle. Repeat with the rest of your cakes. Then grab the red and draw horizontal stripes. I was ill-prepared and did not have a utensil for this, so I used a knife, but a toothpick or popsicle stick would probably work well.

Finally, you can't have stripes without the stars! Find some white sprinkles, drop them into the blue, and TA-DA! - you have our nation's flag on a delicious mini-cake!


I brought a few of these to a little gathering, and everybody loved them! Very cute and easy to serve for a little snack. :) What kind of treats are you serving up this July 4? Let me know in my brand spankin' new comments section (!!!). Also, I'd love to hear what y'all think of the new design. It is definitely still a work in progress, but it's getting better by the day!

Have a great day!

Friday, April 10, 2015

egg-cellent leftovers

Hey y'all! I'm sorry I haven't written in so long, but I'm getting back into the swing of things now, so be expecting some new posts! This past week we celebrated Easter and my family ended up boiling and dying 24 eggs. A little egg-cesive, I know {Sorry, I can't resist the egg puns}. We also had a few extra that my Grammie gave to us, so we've got quite a few eggs to eat in my household. Here are a few ideas for things to make with your Easter leftovers.


Egg Salad

This is an obvious one, but egg salad is one of my favorites so I had to include it. I make mine by taking two hard-boiled eggs and mashing them up with a fork. Then you add mayo and mustard to taste. I like to give it a little crunch and acidity with some pickle relish as well. This is great to eat on a sandwich, or just by itself!


Deviled Eggs

Another kind of 'duh' recipe, but still a good one. To make these deviled eggs, boil and egg, cut it in half, take the yolk out, and put it into a bowl. Then, add mayo, mustard, vinegar, salt, and pepper. Mix these ingredients together and then plop them back into the hole in the egg. These are great for snacking on!


Soy Sauce Eggs

This one is a little less on the traditional side. I had actually never heard about it til I saw it on Pinterest. Basically, you hard boil an egg, peel it, and boil it again in soy sauce. The soy sauce seasons the egg, not to mention makes it look really cool. For the exact specifications, put about 5 tbs. of soy sauce into a sauce pan and let it heat up til it's foaming. Once it it, carefully plop your eggs in and let it go on medium heat until they're covered and the soy sauce is getting kind of sludgy. I was a little skeptical about these, but they turned out to be really good, especially if you like salty things.


I hope y'all like these recipes! Tell me in the comments below what you do with your eggs after Easter. Also, I would love to hear what y'all want to see in the future! 

Thanks for reading!


Friday, January 23, 2015

cowboy cookies

Hey y'all! Today I'm going to show y'all a recipe that my grandmother just gave to me, Cowboy Cookies. These oat based cookies are somewhat healthy, not to mention delicious!


Here are the ingredients you'll need:

1 cup of softened butter
1 cup of brown sugar
2 eggs
1 tsp of vanilla
6 cups of rolled oats
Cinnamon and nutmeg to taste
(Chocolate chips, pecans, and raisins optional)


After combining everything in a large bowl, you'll separate it into 3" patties and place them on a cookie sheet. The recipe calls for a 5-7 minute cook time at 375, but they should probably go for a little longer. Mine were really crumbly and I'm still trying to figure out the cause, but it's probably that they needed a longer cook time, or more liquid in the batter. Here's what the batter and finished product looked like!


Thank y'all for reading! Let me know down below if you try out this recipe! Also, if there's anything you'd like to see on my blog in the future, let me know!

Hope you enjoyed this post!


Saturday, October 25, 2014

getting in the spirit: halloween

Howdy y'all! Halloween is right around the corner, and its time to start getting decorations hung, and festive food made. Here are a few ideas I had for this Halloween's festivities.


Decorating Your Front Porch-
When I decorated I used, of course, the Halloween staple, pumpkins. My pumpkin had a big 'ol Texas cut out and some glittery boots on the side. I achieved this by printing a template of Texas, drawing it on my pumpkin and carving it. For the boots, I printed another template, drew it out, applied Mod Podge within the template borders, and shook some sparkly glitter on top. Rachel, my sister, did the classic Jack-o-Lantern. Overall, I think our pumpkins turned out really cute! 


Next up, I made a banner to go across the front porch. I cut out burlap triangles, glued scrapbook paper letters to them, and glued the triangles to twine. It probably took me 15 minutes, and looks really good! I also only spent $5 on the supplies, and have plenty left over! Here are some pictures of the finished products.


Sweet Treat-
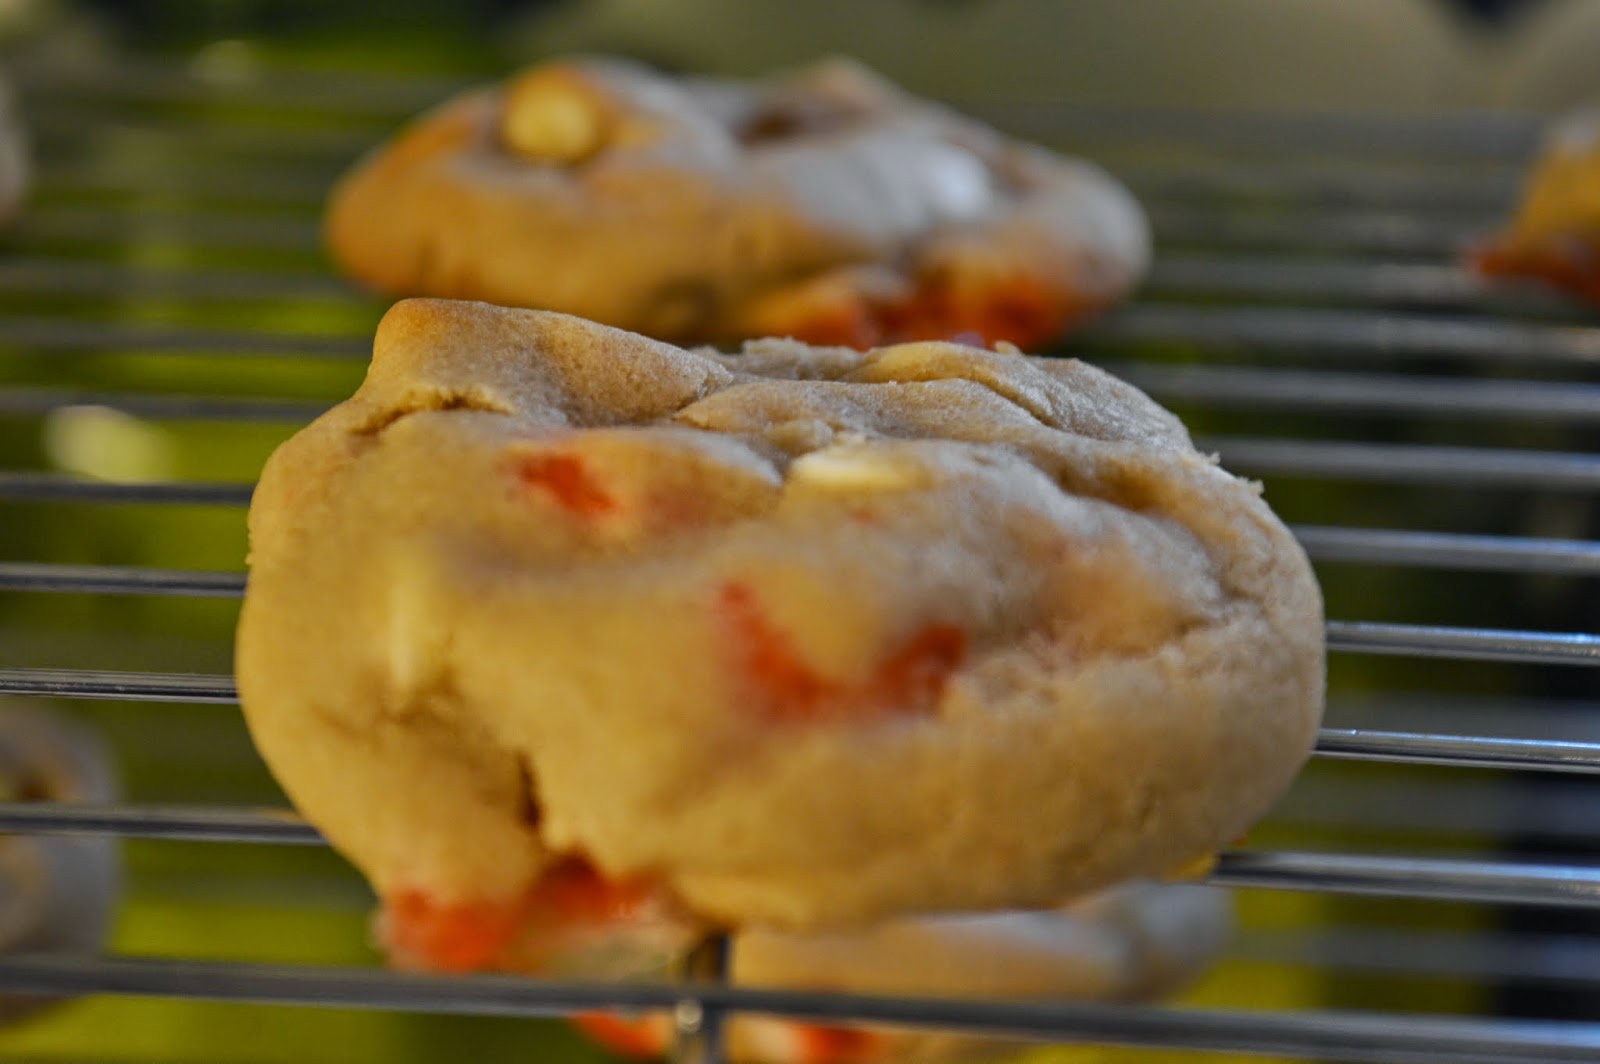
I used this recipe to make some yummy candy corn cookies!

You'll need:
1/2 cup unsalted butter
3/4 cup light brown sugar
1/4 cup granulated sugar
1 egg
1 TBS vanilla
2 TBS cream
2 cups flour
2 TS corn starch
1 TS baking soda
pinch of salt (optional)
1 1/2 cup candy corn (Honestly, this was A LOT of candy corn. If I did it again, I would probably only use a cup)
1 cup white chocolate chips 


To start, I gathered up all of my ingredients.


Then I put the first 5 ingredients listed into a large mixing bowl (If you have a stand mixer, use that bowl).


I mixed those with a hand mixer till the batter was a light, fluffy consistency.


I then added the next 5 ingredients.


And mixed those on low speed until they had just made it into the dough.


Next you add the candy corn and white chocolate chips (Again, I would probably just use a cup of the candy corn instead of 1 1/2)


Then you mix all that in (The recipe say to use a utensil, but it was a lot easier to mix evenly with my hands).


You then scoop them, ball them up (making sure no candy corn is on the outside [it will melt]), and place them onto a large plate slightly pressing them flat. Then you will need to chill them for at least 3 hours. I let mine sit overnight.


Finally, you bake them at 8-9 cookies a batch for around 9 minutes at 350 degrees (Fahrenheit). The edges should have set, and the middle should be on its way. Make sure to turn the tray at some point because the ones towards the front won't cook. Let them set/cool for about 5 minutes before transferring to a cooling rack, or a serving platter. 

Sidenote : The candy corn gets really sticky, so I would recommend putting foil on your baking sheet and spraying nonstick spray on top of that. My cookies came off relatively easy that way. 


I'm really sorry that this post came late, but I hope y'all enjoyed it. Those cookies are honestly some of the most delicious things I've ever eaten, and I really hope you'll try them out! 

I love you, Jesus loves you, Dr. Phil loves you,


p.s. The signature is a little inside joke with some of my friends that I thought I'd include. It is also very true. :)